環境:Mac OS X 10.6.2
android-ndk-r3-darwin-x86.zipを「http://developer.android.com/」からダウンロードして適当に展開する。
おれは「/Users/babukuma/dev/android-ndk-r3」にした。(以下$NDK)
1. Androidプロジェクト生成
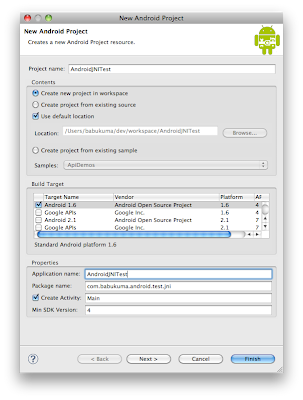
テスト用のプロジェクトを生成する。
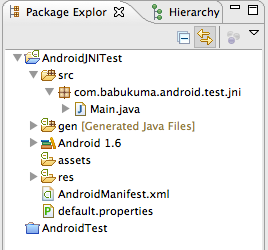
生成するとこの構成になるはず。
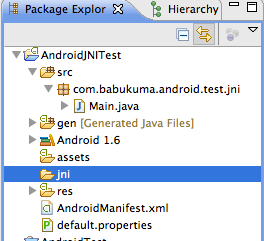
「jni」フォルダ作成
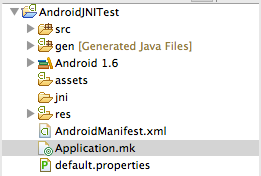
2.「Application.mk」ファイル作成。
プロジェクトディレクトリ下に「Application.mk」ファイルを作成。
今回はモジュール名を「jnitest」にした。
書き方は「$NDK/docs/APPLICATION-MK.TXT」参照
# Application.mk
APP_PROJECT_PATH := $(call my-dir)
APP_MODULES      := jnitest
3. Nativeメソッド作成。
「Main.java」ファイルに作成した。
package com.babukuma.android.test.jni;

import android.app.Activity;
import android.os.Bundle;

public class Main extends Activity {
     /** Called when the activity is first created. */
     @Override
     public void onCreate(Bundle savedInstanceState) {
          super.onCreate(savedInstanceState);
          setContentView(R.layout.main);
     }

     public native String helloJNI();

     public native int add(int a, int b);
}
4. ヘッダファイル生成
プロジェクトディレクトリで「javah」コマンドでヘッダファイル「jni/jnitest.h」を生成。
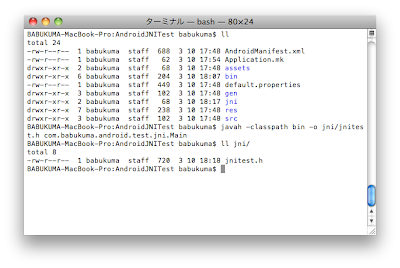
生成された「jnitest.h」ファイル
/* DO NOT EDIT THIS FILE - it is machine generated */
#include<jni.h>
/* Header for class com_babukuma_android_test_jni_Main */

#ifndef _Included_com_babukuma_android_test_jni_Main
#define _Included_com_babukuma_android_test_jni_Main
#ifdef __cplusplus
extern"C" {
#endif
/*
 * Class:     com_babukuma_android_test_jni_Main
 * Method:    helloJNI
 * Signature: ()Ljava/lang/String;
 */
JNIEXPORT jstring JNICALL Java_com_babukuma_android_test_jni_Main_helloJNI
  (JNIEnv *, jobject);

/*
 * Class:     com_babukuma_android_test_jni_Main
 * Method:    add
 * Signature: (II)I
 */
JNIEXPORT jint JNICALL Java_com_babukuma_android_test_jni_Main_add
  (JNIEnv *, jobject, jint, jint);

#ifdef __cplusplus
}
#endif
#endif
5. Cソース作成。
「jni」ディレクトリで「jnitest.c」を作成する。
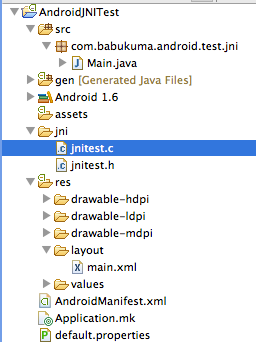
作った「jnitest.c」ファイル
#include<jni.h>
#include"jnitest.h"

JNIEXPORT jstring JNICALL Java_com_babukuma_android_test_jni_Main_helloJNI(
          JNIEnv *env, jobject thisObj) {
    jstring result = (*env)->NewStringUTF(env, "Hello JNI !");
    return result;
}

JNIEXPORT jint JNICALL Java_com_babukuma_android_test_jni_Main_add(JNIEnv *env,
          jobject thisObj, jint a, jint b) {
    jint result = a + b;
    return result;
}
6. 「Android.mk」ファイルを作成する。
jniディレクトリに「Android.mk」ファイルを作成する。
書き方は「$NDK/docs/ANDROID-MK.TXT」参照
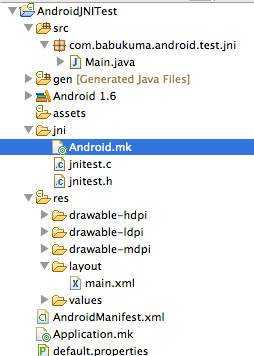
作った「Android.mk」ファイル
# Android.mkLOCAL_PATH := $(call my-dir)

include$(CLEAR_VARS)

LOCAL_MODULE    := jnitest
LOCAL_SRC_FILES := jnitest.c

include$(BUILD_SHARED_LIBRARY)
7. Cソースビルド
ビルドをするにはプロジェクトPATHが「$NDK/apps/<プロジェクト>」になる必要があるのでリンクを作った。
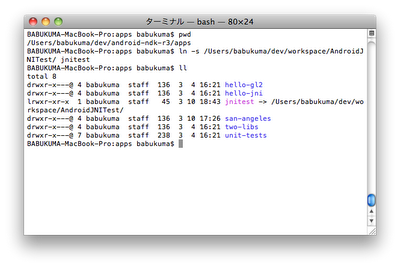
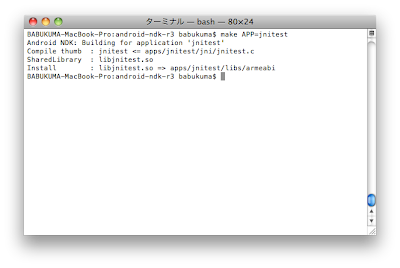
$NDKディレクトリで「make APP=jnitest」でビルド
ここで「jnitest」は「$NDK/apps/」下のプロジェクトフォルダ名になる。
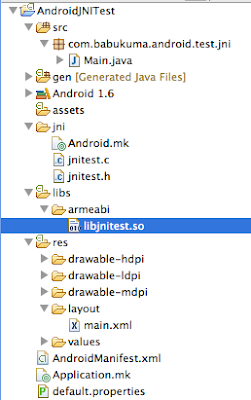
Eclipseをリロードしてみると「libs/armeabi/libjnitest.so」ファイルが生成されたのがわかる。
8. Javaソースを修正して実行してみる。
修正後の「Main.java」ファイル
package com.babukuma.android.test.jni;

import android.app.Activity;
import android.os.Bundle;
import android.widget.TextView;

public class Main extends Activity {
     static {
          System.loadLibrary("jnitest");
     }

     /** Called when the activity is first created. */
     @Override
     public void onCreate(Bundle savedInstanceState) {
          super.onCreate(savedInstanceState);
          setContentView(R.layout.main);

          // call helloJNI()
          TextView result1 = (TextView) findViewById(R.id.text_result_1);
          result1.setText(helloJNI());

          // call add(1, 2)
          TextView result2 = (TextView) findViewById(R.id.text_result_2);
          result2.setText("1 + 2 = " + add(1, 2));
     }

     public native String helloJNI();

     public native int add(int a, int b);
}
修正後実行してみるとNativeメソッドが問題なく呼ばれた。
